Strawberry Lasagna is exactly what your summer parties have been missing because it combines creamy layers with fresh fruit in the most delightful way possible. If you are tired of the same old heavy cakes or messy fruit salads, this Strawberry Lasagna will change your dessert game forever. I remember the first time I brought this to a neighborhood potluck; people looked at me funny when I said I brought lasagna for dessert, but one bite later, they were begging for the recipe. It is cold, refreshing, and honestly, it is the best way to handle a humid July afternoon when you cannot even think about turning on the oven. Busy moms know the struggle of wanting to make something impressive without spending four hours in a hot kitchen. Since this recipe requires zero baking, you can keep your house cool and your sanity intact while still serving a dish that looks like it came from a high-end bakery. Whether you are hosting a graduation party, a Fourth of July bash, or just a Tuesday night family dinner, this sweet treat hits the spot every single time.
What is Strawberry Lasagna?
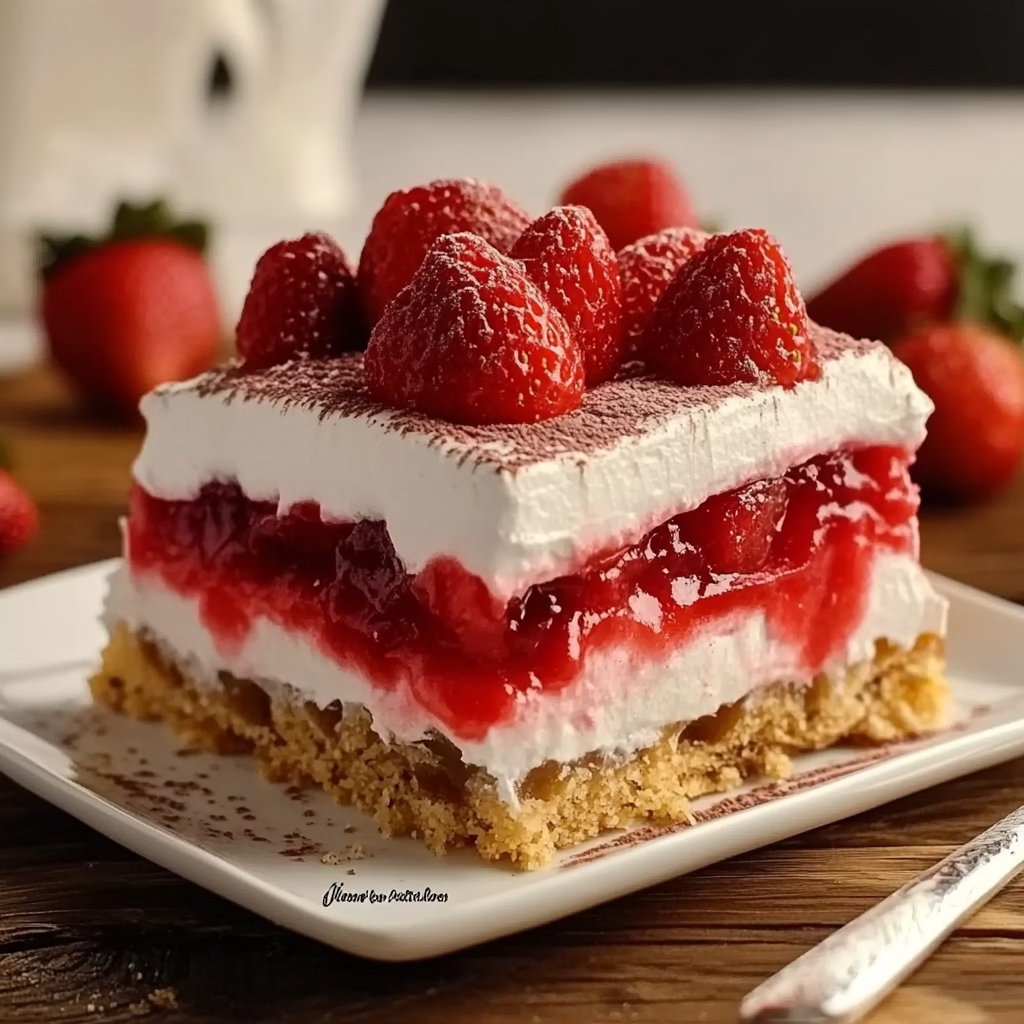
Strawberry Lasagna is a layered dessert that mimics the structure of the classic Italian pasta dish but replaces savory ingredients with sugary, creamy goodness. Instead of noodles, we use a buttery graham cracker crust that provides a solid foundation and a nice crunch. Instead of ricotta and marinara, we build layers using a sweetened cream cheese mixture, velvety vanilla pudding, and piles of juicy, sliced strawberries. It is often referred to as a “lush” or a “dessert lasagna” in different parts of the country. This dish falls into the beloved category of refrigerator cakes, where time and cold air do all the hard work of setting the ingredients into sliceable perfection. You get a bit of everything in one forkful: the saltiness of the butter, the tang of the cream cheese, the sweetness of the berries, and the smooth finish of the whipped topping. It is a nostalgic American classic that reminds many people of church socials or family reunions in the Midwest, but it has gained popularity everywhere because it is just so easy to love.
Reasons to Try Strawberry Lasagna
Strawberry Lasagna is a winner for several reasons, but the biggest one is the “no-bake” factor. We have all been there where we promised to bring a dessert, and then the day turns out to be a total scorcher. When you choose this recipe, you avoid the heat of the oven entirely, which is a massive win for your electricity bill and your comfort level. Another reason to dive into this dish is its incredible versatility. While we are focusing on strawberries today, the framework of this dessert allows you to swap fruits depending on what is in season. However, there is something truly special about the combination of strawberries and cream that other fruits just cannot quite match. It is also a fantastic make-ahead option. In fact, it actually tastes better after sitting in the fridge for a few hours because the flavors have time to mingle and get to know each other. If you have picky eaters at home, this is your secret weapon. Kids love the pudding and whipped cream, while adults appreciate the fresh fruit and the balanced sweetness. It is a crowd-pleaser that requires very little technical skill, making it perfect for beginning bakers or busy professionals who need a win in the kitchen.
Ingredients Needed to Make Strawberry Lasagna
- 1 package of graham cracker crumbs (about 1.5 to 2 cups)
- 1/2 cup unsalted butter, melted (one full stick)
- 1 package (8 oz) cream cheese, softened to room temperature
- 1 cup powdered sugar (sifted if it is particularly lumpy)
- 1 container (8 oz) whipped topping, thawed (like Cool Whip)
- 2 cups fresh strawberries, hulled and sliced thin
- 1 package (3.4 oz) instant vanilla pudding mix
- 2 cups cold whole milk or 2% milk
- 1 cup additional sliced strawberries for a beautiful topping
Instructions to Make Strawberry Lasagna – Step by Step
Step 1: Crafting the Perfect Graham Cracker Foundation Step by Step
To begin this process, you need to create a solid base that can support all those heavy, delicious layers. Start by taking your graham cracker crumbs and placing them into a medium-sized mixing bowl. If you bought whole crackers instead of crumbs, just toss them into a food processor or a plastic bag and crush them until they look like fine sand. Pour your melted unsalted butter over the crumbs and stir everything together with a fork. You want the mixture to feel like wet sand that holds its shape when you pinch it. Once combined, dump the mixture into a 9×13 inch glass baking dish. Use the bottom of a measuring cup or your hands to press the crumbs firmly and evenly across the bottom. Make sure you get into the corners so every slice has a sturdy crust. This is a crucial part of the process because a loose crust will fall apart when you try to serve it later. After you have pressed it down, pop the dish into the refrigerator for about 10 to 15 minutes while you work on the next part. This helps the butter solidify, which “sets” the crust without needing heat.
Step 2: Mixing the Creamy Dream Layer Step by Step
While your crust is chilling, it is time to make the first creamy layer. In a large bowl, take your softened cream cheese and the powdered sugar. It is very important that your cream cheese is actually soft; if it is too cold, you will end up with little white lumps that are impossible to get out. Use a hand mixer on medium speed to beat these two together until the mixture is completely smooth and fluffy. Once that looks good, put down the mixer and grab a spatula. Gently fold in half of your thawed whipped topping. You want to use a folding motion rather than stirring so you keep the air in the whipped cream, which makes the layer light and airy. After the mixture is uniform, take your baking dish out of the fridge and spread this cream cheese mixture over the crust. Use an offset spatula to get it smooth from edge to edge. This layer acts as a barrier that keeps the crust from getting soggy once we add the fruit and pudding.
Step 3: Adding the Fresh Fruit Layer Step by Step
Now comes the star of the show: the strawberries. Take your two cups of sliced strawberries and arrange them in a single, even layer over the cream cheese mixture. You do not have to be perfect here, but try to cover as much of the white cream as possible. The juice from these berries will slightly seep into the cream cheese below, creating a wonderful flavor profile. If your berries are a bit tart, you can sprinkle a tiny bit of extra sugar over them, but usually, the sweetness of the other layers balances them out perfectly. This step adds that essential “snap” of fresh fruit that prevents the dessert from feeling too heavy or artificial.
Step 4: Whisking the Vanilla Pudding Layer Step by Step
In another clean bowl, combine your instant vanilla pudding mix and the two cups of cold milk. It is vital to use cold milk here because instant pudding relies on cold temperatures to activate the thickening agents. Whisk the mixture vigorously for about two full minutes. You will feel it start to get heavy and thick as you move the whisk. Once it has reached a consistency where it holds its shape slightly, pour it directly over the strawberry layer. Again, use your spatula to spread it out into an even layer. The yellow hue of the vanilla pudding looks beautiful against the red of the strawberries and the white of the cream cheese. This layer adds a silky texture that ties the whole dessert together.
Step 5: The Final Creamy Topping and Decoration Step by Step
For the final assembly, take the remaining whipped topping and spread it carefully over the pudding layer. You have to be gentle here because the pudding might still be a bit soft, and you do not want to swirl the two layers together (unless you like that marbled look!). Once the top is smooth, take your final cup of sliced strawberries and arrange them on top in a pattern. You can do rows, a border, or just a random scattering for a more rustic look. If you want to get really fancy, you could even add a few mint leaves for a pop of green or a drizzle of chocolate sauce. This top layer makes the dessert look finished and professional.
Step 6: The Long Wait for Perfection Step by Step
The hardest part of this entire recipe is the waiting. You must place the Strawberry Lasagna back into the refrigerator for at least four hours. If you can leave it overnight, that is even better. During this time, the graham cracker crust softens just enough to be bite-tender, and the pudding and cream cheese layers firm up so you can cut clean, beautiful squares. If you try to cut into it too early, it will taste delicious but it will look like a messy pile of soup on the plate. Patience is a virtue, especially when it comes to no-bake treats. Once it is fully set, use a sharp knife to cut it into 12 generous servings and enjoy the looks of pure joy on everyone’s faces.
What to Serve with Strawberry Lasagna
Since Strawberry Lasagna is a relatively light and fruity dessert, it pairs wonderfully with classic American summer fare. If you are hosting a backyard barbecue, serve this after a main course of grilled chicken, ribs, or burgers. The coolness of the strawberries cuts right through the smoky, savory flavors of grilled meat. For a lighter lunch, it goes great alongside a crisp spinach salad with pecans or a refreshing cucumber salad. When it comes to drinks, a cold glass of lemonade or a sweet iced tea is the traditional choice. If you are looking for something a bit more “adult,” a chilled glass of Rosé or a Prosecco cocktail complements the berry flavors beautifully. Since the dessert itself is quite creamy, you do not really need to add anything like ice cream or more whipped cream on the side. However, a small sprig of fresh mint on each plate can provide a nice aromatic contrast and make the presentation feel a bit more upscale.
Key Tips for Making Strawberry Lasagna
One of the best tips I can give you is to make sure your cream cheese is truly at room temperature. I usually take mine out of the fridge at least two hours before I start. If you are in a rush, you can take it out of the foil and microwave it for 15 seconds, but be careful not to melt it. Another tip involves the strawberries; try to pat them dry with a paper towel after washing and slicing them. Excess water can make the layers slide around and lead to a “weeping” dessert. Also, if you want a crust that is a bit more firm, you can actually bake the graham cracker and butter mixture at 350 degrees for about 8 minutes before letting it cool completely. This gives it a toasted flavor and a much crunchier texture. Finally, always use a sharp knife and wipe it clean between every single cut. This ensures that the layers stay distinct and beautiful when you pull the slice out of the pan. It might seem like a lot of work, but the visual result is worth the extra thirty seconds of effort.
Storage and Reheating Tips Strawberry Lasagna
Storing Strawberry Lasagna is quite simple because it loves the cold. You should always keep it covered with plastic wrap or a tight-fitting lid in the refrigerator. It will stay fresh and delicious for about 3 to 4 days. After that, the strawberries might start to release more of their juices, which can make the crust a bit soggy, but it will still taste good. As for reheating, you should never do it! This is a strictly cold dessert meant to be eaten straight from the fridge. If you find yourself with leftovers that you cannot finish in time, you can actually freeze this dessert. Wrap individual slices tightly in plastic wrap and then foil. When you are ready to eat, let a slice thaw in the fridge for about an hour. It will have a slightly different, more “ice cream cake” like texture, which is actually quite pleasant on a hot day. However, for the best experience, eating it fresh within the first 48 hours is always the way to go.
FAQs
Can I use frozen strawberries instead of fresh ones? While you can technically use frozen strawberries, I do not recommend it for this specific recipe. Frozen berries tend to hold a lot of water and become very mushy once they thaw. This extra moisture will likely ruin the consistency of your cream cheese and pudding layers. If you absolutely must use them, make sure they are completely thawed and drained very well, but fresh berries will always give you a much better result.
Is there a way to make this recipe gluten-free? Absolutely! You can easily swap the traditional graham crackers for a gluten-free graham cracker brand. Most instant pudding mixes are naturally gluten-free, but always double-check the label to be safe. The rest of the ingredients like butter, cream cheese, and fruit are naturally free of gluten.
Can I use homemade whipped cream instead of whipped topping? Yes, you can use real whipped cream, but keep in mind that it is less stable than commercial whipped topping. If you use real cream, you might want to add a stabilizer like a bit of unflavored gelatin or extra powdered sugar to help it hold its shape for a longer period in the fridge.
What if I don’t like vanilla pudding? No problem at all! You can customize this by using cheesecake flavored pudding, white chocolate pudding, or even lemon pudding if you want a citrusy twist. The vanilla is just a neutral base that lets the strawberries shine, but feel free to get creative with your flavors.
Final Thoughts
Strawberry Lasagna is more than just a recipe; it is a stress-free solution for anyone who wants to bring a bit of sweetness to the table without breaking a sweat. It captures the essence of summer with every bite, combining the nostalgia of a graham cracker crust with the timeless appeal of strawberries and cream. By following this guide, you have learned how to build layers of flavor that will impress your friends and satisfy your family’s cravings. Don’t be afraid to make this your own by adding different toppings or adjusting the sweetness to your liking. The beauty of this dish lies in its simplicity and its ability to bring people together over a shared love of great food. So, the next time you see a sale on fresh berries at the grocery store, grab a few cartons and get ready to assemble the most refreshing dessert of the season. Your kitchen stays cool, your guests stay happy, and you get to enjoy a slice of pure summer bliss.