Breakfast Pancake Poppers are about to become your new best friend because mornings in a busy household often feel like a marathon you didn’t sign up for. You wake up, the dog is barking, the kids can’t find their shoes, and you still have to figure out how to put a warm meal on the table. Instead of standing over a hot griddle flipping circles for thirty minutes, you can just pop these Breakfast Pancake Poppers into the oven and breathe. These little bites are fluffy, sweet, and perfectly portable, making them a dream for anyone who needs to eat while running out the door. Honestly, I used to struggle with the whole “pancake morning” thing because someone always ended up with a cold plate while I was still cooking the last batch. However, these tiny treats solve that problem entirely since they all finish at the exact same time. Consequently, everyone gets a hot breakfast together, and you finally get to sit down and sip your coffee while it is actually still hot. Basically, this recipe is a total game-changer for your sanity.
What is Breakfast Pancake Poppers?
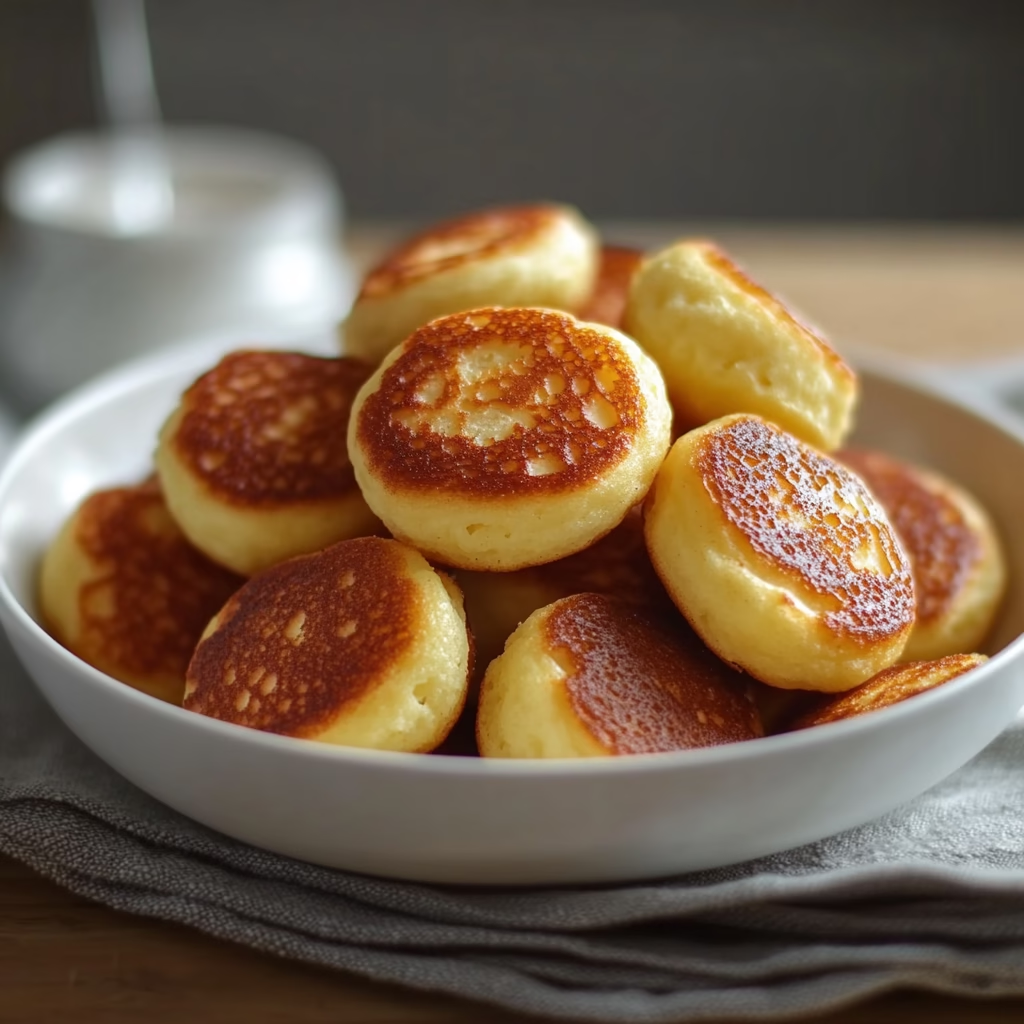
You might be wondering what exactly makes these different from a regular pancake or a muffin. Well, a pancake popper is essentially a classic pancake batter that we bake in a mini muffin tin instead of frying in a pan. Because we use a muffin tin, the edges get a slightly crisp texture while the inside remains airy and soft. This method gives you a bite-sized snack that tastes exactly like your favorite diner breakfast but looks like a cute little donut hole. Specifically, these are great for little hands to grab, but let’s be real, us adults love them just as much. They are essentially the “pop-able” version of a comfort food classic. Instead of using a fork and knife, you can just dip these into a little bowl of maple syrup and go to town. Truly, they are the most convenient way to enjoy the flavors you love without the sticky mess on the kitchen counter.
Reasons to Try Breakfast Pancake Poppers
There are so many reasons to fall in love with this recipe, starting with how much time you will save. First of all, you don’t have to stand over a stove and watch for bubbles to pop before flipping. Instead, the oven does all the heavy lifting for you while you pack lunch boxes or find that missing backpack. Secondly, these are incredibly kid-friendly because they are the perfect size for toddlers and picky eaters. If your kids usually leave half a giant pancake on their plate, they will likely finish three or four of these without a single complaint. Furthermore, these are excellent for meal prep. You can bake a double batch on Sunday, toss them in the freezer, and then just microwave a few on Wednesday morning. It is a massive win for your schedule. Additionally, they are highly customizable, so you can add chocolate chips to some and blueberries to others without any extra effort. Clearly, this versatility makes them a staple in any kitchen.
Ingredients Needed to Make Breakfast Pancake Poppers
- 1 cup all-purpose flour: This provides the structure for our fluffy bites.
- 1 tablespoon granulated sugar: Just enough to give them that classic pancake sweetness.
- 1 teaspoon baking powder: This is what makes them puff up beautifully in the oven.
- 1/4 teaspoon salt: A little salt helps balance the sugar and brings out the flavor.
- 3/4 cup milk: You can use whole milk, 2%, or even an almond milk alternative.
- 1 large egg: This acts as the glue that holds our batter together.
- 2 tablespoons melted butter: Butter adds richness and helps the edges get golden brown.
- 1 teaspoon vanilla extract: A splash of vanilla makes these smell like a professional bakery.
Instructions to Make Breakfast Pancake Poppers – Step by Step
Step 1: Prepare the Oven and Pan
Before you do anything else, you need to get your oven ready for the magic. Go ahead and preheat your oven to 375°F (190°C). While the oven is warming up, grab your mini muffin pan and give it a good coating of non-stick spray. This Step by Step process begins with a well-greased pan because you definitely don’t want your precious poppers sticking to the sides. If you don’t have spray, a little bit of melted butter rubbed into each cup works perfectly too.
Step 2: Mix Your Dry Ingredients
Next, take a medium-sized mixing bowl and whisk together your flour, sugar, baking powder, and salt. It is important to combine these thoroughly so that the baking powder is distributed evenly. This Step by Step approach ensures that every single popper rises just as high as its neighbor. If you skip this, you might end up with some flat poppers and some giant ones, which is not what we want.
Step 3: Whisk the Wet Ingredients
In a separate smaller bowl, whisk together the milk, egg, melted butter, and vanilla extract. You want to beat the egg until it is fully integrated with the milk. Because the butter is melted, make sure it isn’t piping hot when you add it to the egg, or you might accidentally scramble it. This part of the Step by Step guide is where all the moisture and flavor live, so take a second to make sure it looks smooth and consistent.
Step 4: Combine the Batter Gently
Now, pour your wet ingredients into the bowl with the dry ingredients. Use a spatula or a spoon to stir them together until they are just combined. A very important tip for this Step by Step instruction is to avoid over-mixing. If you stir too much, the gluten in the flour will get tough, and your poppers will be chewy instead of fluffy. It is totally fine if there are a few small lumps left in the batter; those will disappear during the baking process anyway.
Step 5: Scoop the Batter into the Pan
Using a small spoon or a cookie scoop, fill each mini muffin cup about two-thirds of the way full. You want to leave a little bit of room at the top so they can grow without overflowing. Following this Step by Step method helps you keep the portions consistent so they all cook at the same rate. If you want to add chocolate chips or berries, now is the time to drop a couple onto the top of each scoop of batter.
Step 6: Bake Until Golden Brown
Slide that pan into the center rack of your preheated oven. You will want to bake them for about 10 to 12 minutes. Keep an eye on them through the oven window; you are looking for the tops to puff up and the edges to turn a beautiful golden brown color. This Step by Step phase requires a little bit of patience, but the smell filling your kitchen will be worth it. Once they look firm and bouncy, they are ready to come out.
Step 7: Cool and Serve Warm
Finally, remove the pan from the oven and let the poppers sit for just a minute or two. This brief resting period makes them much easier to pop out of the tin. Use a butter knife to gently loosen any edges if needed, then pile them high on a plate. Serve them immediately while they are still warm and cozy. This final Step by Step move is the best part because you finally get to enjoy the fruits of your labor with a big drizzle of syrup.
What to Serve with Breakfast Pancake Poppers
When it comes to serving these delicious morsels, the options are honestly endless. Naturally, a side of high-quality maple syrup is the classic choice for dipping. However, if you want to get a little fancy, you could offer a side of warm berry compote or even some chocolate hazelnut spread. For a more balanced breakfast, I love serving these alongside some crispy bacon or savory sausage links. The saltiness of the meat pairs perfectly with the sweet dough of the poppers. If you are serving these for a brunch party, you could even create a “dipping station” with different toppings like whipped cream, sprinkles, and peanut butter. Consequently, your guests can customize their own plates, which is always a huge hit. Additionally, a fresh fruit salad with melons and grapes provides a refreshing contrast to the warm, baked texture of the pancakes.
Key Tips for Making Breakfast Pancake Poppers
One of the most important things to remember is the consistency of your batter. If the batter feels too thick, you can add an extra tablespoon of milk to loosen it up. On the other hand, if it looks too runny, a tiny bit more flour will help. Also, make sure your baking powder is fresh because that is the secret to getting that perfect “pop” in the oven. Another great tip is to use a silicone mini muffin pan if you have one. These pans are naturally non-stick and make it incredibly easy to push the poppers out from the bottom. If you are using a metal pan, just be generous with your grease. Furthermore, don’t be afraid to experiment with the flavors. You can add a pinch of cinnamon or even some lemon zest to the batter to give it a bright, unique twist. Actually, adding a little bit of Greek yogurt to the wet ingredients can make them even more moist and tender.
Storage and Reheating Tips Breakfast Pancake Poppers
If you actually have leftovers, which is rare in my house, you can store them easily for later. Simply let them cool completely on a wire rack before putting them into an airtight container or a zip-top bag. They will stay fresh in the refrigerator for about three to four days. For longer storage, these poppers freeze like a dream. Just lay them out on a baking sheet in a single layer to freeze them individually first, then toss them all into a freezer bag. This prevents them from sticking together in one big clump. When you are ready to eat, you can reheat them in the microwave for about 20 to 30 seconds. Alternatively, if you want to bring back that slightly crisp exterior, pop them into a toaster oven for a few minutes. They taste just as good as the day you made them, which makes your weekday mornings feel much more manageable.
FAQs
Can I make these gluten-free? Yes, you certainly can! Simply swap the all-purpose flour for a 1:1 gluten-free flour blend. Just make sure the blend contains xanthan gum to help with the structure.
Do I have to use a mini muffin tin? While the mini size is what makes them “poppers,” you can use a regular-sized muffin tin if that is all you have. Just keep in mind that you will need to increase the baking time to about 18 to 20 minutes since they are much larger.
Can I use a pre-made pancake mix? Absolutely. If you are in a major rush, feel free to use your favorite boxed mix. Just follow the instructions on the box to make the batter, then follow my baking steps here.
How do I keep them from getting dry? The biggest culprit for dry poppers is over-baking. Check them at the 10-minute mark; as soon as they are set and lightly golden, take them out. Also, the melted butter in the recipe helps keep them moist.
What kind of mix-ins work best? Mini chocolate chips, wild blueberries, and finely chopped strawberries are my favorites. You could even do a savory version with tiny bits of cooked bacon and shredded cheddar cheese.
Final Thoughts
Breakfast Pancake Poppers are truly the ultimate solution for anyone who loves a classic breakfast but hates the morning stress. They are fast, delicious, and incredibly versatile for any palate. Whether you are feeding a group of hungry toddlers or just looking for a better way to meal prep your own work week, these little bites deliver every single time. I hope this recipe brings a little bit of peace and a lot of flavor to your kitchen. Once you try this method, you might never go back to the traditional griddle again because the convenience is just too good to pass up. So, go ahead and grab your muffin tin, preheat that oven, and get ready to enjoy the best Breakfast Pancake Poppers you have ever had. Your family will thank you, and your morning routine will definitely feel a whole lot smoother.